DIY-Projects
Innovating the future with Infineon solutions
Our makers community is alive with an endless stream of application ideas. In a fun and exploratory way, our makers are developing functional solutions using our integrated prototyping concept together with our motor control, sensor, connectivity and power supply solutions.
And make no mistake: While our integrated developer tools make working on innovative do-it-yourself (DIY) projects easy, the results can be astonishing – and economically viable! After all, many successful start-up companies and Industry 4.0 ideas were born out of DIY-beginnings.
In this section, we want to highlight some standout DIY-projects across a broad range of industries including security, automotive, smart home, Internet of Things (IoT), and Industry 4.0/Robotics. For inspiration, these how-to examples of DIY projects from our makers feature full documentation and code examples to build your own.
Autonomous driving car

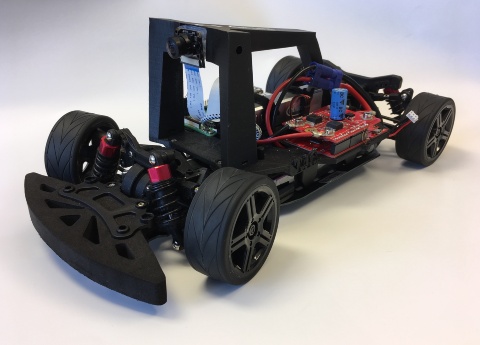
The future of autonomous driving arrives in this innovative RC-car based on the donkeycar project and equipped with a camera, a Raspberry Pi, a XMC1100 Boot Kit and the DC Motor Control Shield with BTN8982TA. With software developed in the Arduino IDE, the car is connected to a neuronal network that processes image, throttle and steering data to learn autonomous driving.
The best part: With all components widely available from Infineon and motor controls shared on our Github page you can build your own autonomous driving car now. Instructions on how to build a self-driving donkey car are available at the link below.
Read the full story (featuring building instructions)
DC Motor Control Shield with BTN9970LV
(*DC Motor Control Shield with BTN8982TA is discontinued and replaced with DC Motor Control Shield with BTN9970LV)
Arcade Gaming Station

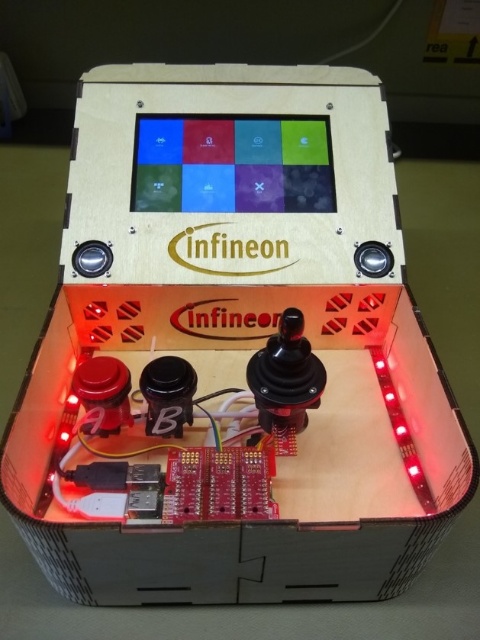
Bring “Super Mario”, “Pacman” and “Tetris” back to live with this retro arcade machine! We combined our magnetic Hall and 3D Hall sensors as well as our MERUSTM audio amplifier HAT with a Raspberry Pi 4 to recreate the experience of a gaming machine of the 80’s using state of the art technology.
The best part: With our new Shield2Go Adapter for Raspberry Pi you can connect Shield2Go boards to a Raspberry Pi in a very fast and easy way.
Radar Speed Monitor

Interested in speed?
This speed monitor equipped with a Sense2GoL radar evaluation board and a XMC2Go microcontroller shows you the speed of a moving object in front of it.
The best part: As the sensor module uses a 24GHz radar it can be completely covered by the front panel.
This can also be used in smart homes for presense detection using an invisible sensor.
Smart advent calendar

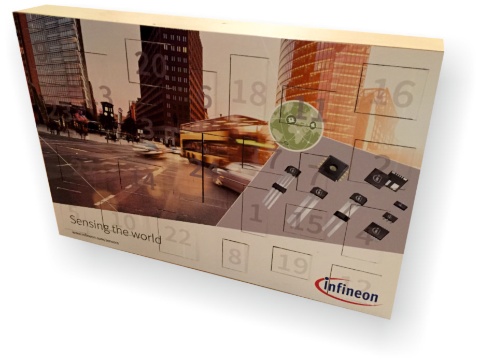
How about an advent calendar that opens the right door on the right day all by itself? See how our maker community built a smart advent calendar equipped with a XMC1100 Boot Kit, the 24V Protected Switch Shield with BTT6030-2EKA and BTT6020-1EKA and a self-made shield containing five BTS3035TF low side switches.
Based on the information from a real time clock (RTC), the XMC microcontroller activates a pair of low and high side switches to open one of the 24 calendar doors. It’s the perfect Holiday gift for makers and tinkerers – plus you can learn how to build one yourself in the story below.
Read the full story (featuring building instructions)
Dual Sensor Box Kit

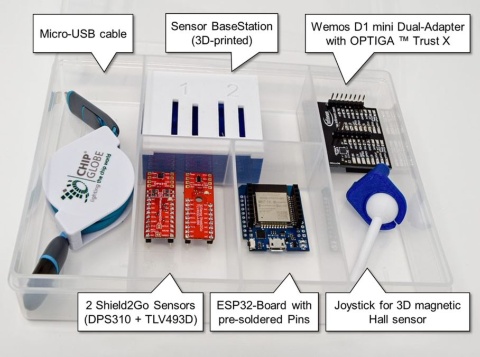
Dual sensor kit based on ESP32
This Dual Sensor Box is an ESP32-based kit of two Sensors (Barometric Pressure Sensor DPS310 and the 3D Magnet Sensor TLV493D), which can get plugged onto the dual-slotted 3D-printed BaseStation. Therefore the GPIO-Pins of the Sensors are pre-soldered. No soldering required. This BaseStation contains the ESP32-Board plus OPTIGA™-Trust-X Adapter Board with the 2 Slots inside the white-blue color 3D-printed enclosure. Find the STL-Files for your customized 3D-print in your colours choice attached. The kit comes with a Micro-USB-cable and an Joystick for mounting to the 3D-Magnet Sensor.
Note: The acrylic storage box is a perfect fit for all your XENSIV™ Shield2Go cardbox-packages collection.
